Crochet stitching is an art that many women follow and howdy, it’s satisfying! If you are someone who has been going through many pins on the Pinterest and wishing that you could create that beautiful art as well, then you have landed on the correct place as today we are going to learn How to be a Pro at Crochet Stitching – Crochet Sticking Guide for Beginners!
Since you are a beginner, let’s take one step at a time! We have all the information about what supplies you will need and how to do the basic stitching. Moreover, we have a detailed step-by-step illustration of how to do it so that you can become a pro! In addition, here is How Leather Jackets Are Made, we hope you find it interesting!
How to be a Pro at Crochet Stitching – Crochet Sticking Guide for Beginners
Are you ready for the tutorial? Let’s get started from the prerequisites!
Supplies that you will need as a beginner and how to pick them!
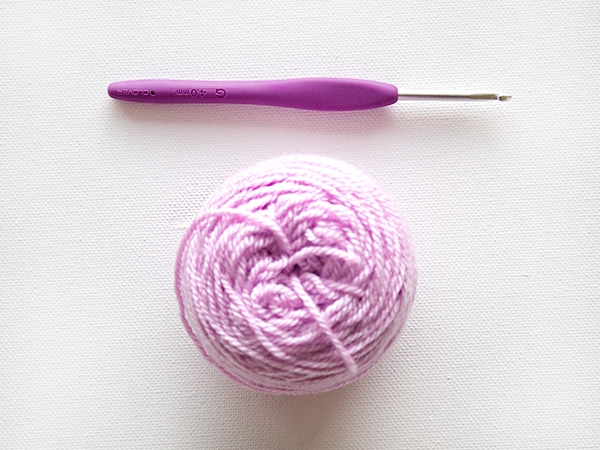
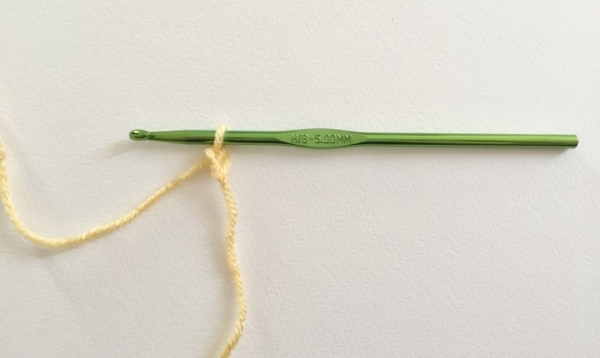
You will need a crochet hook and yarn but these are the things you should keep in mind while choosing them
- The yarn should be mid-weight yarn. Worsted weight yarn is the best for you since you are a beginner
- Choose a yarn that has a good stitch definition. Acrylic, wool or cotton yarns are the best choices for you.
- Choose a light colored yarn so that it is easy to see the insert the hook while you crochet.
- See that the hook matches your yarn in size. G/4.25 is good for you!
With this, here is How Zippers are Made | Raw Materials, Manufacturing and Quality Control!
LET’S START STITCHING NOW
You need to start by doing the slip knot for the hook
Making the slip knot
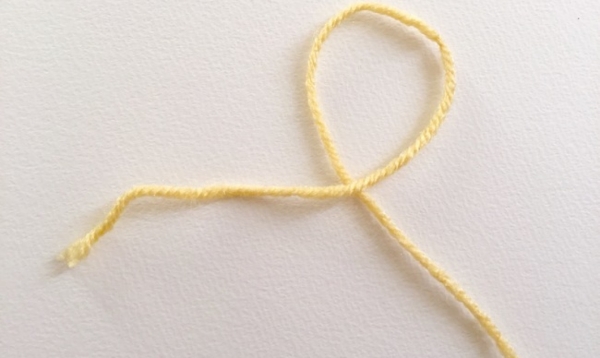
To make a slip knot first make a look with the yarn and bring the end over the working yarn, it should have a length of 4 to 6 inches after crossing. With this, here are Trendy Summer Outfits Ideas for Teen Girls to Try!
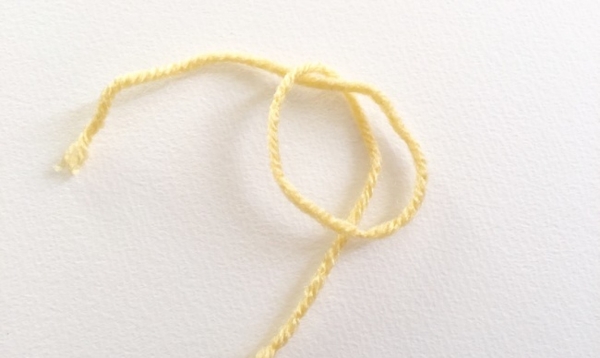
Now make a pretzel shape like the one in this image. You need to take you to end over the other like in this picture. In addition, here are Sexy Eyewear Frame Designs For Men Over 50!
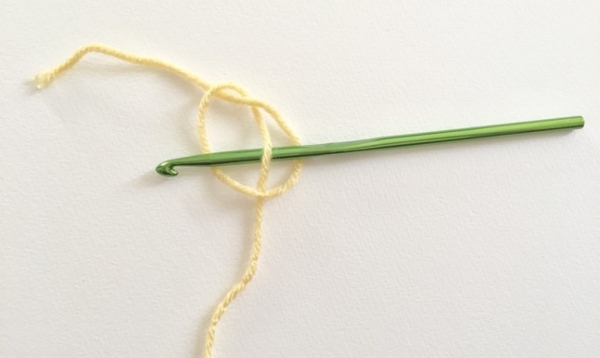
Do not hurry to knot it up. Here you have to put in your crochet needle in the loop and like we have clearly shown in the image above. Remember you have to exactly like this or you will tie the wrong kind of knot. With this, here are How Eyeglass Frames are Made | Designing, Raw Materials, and Manufacturing!
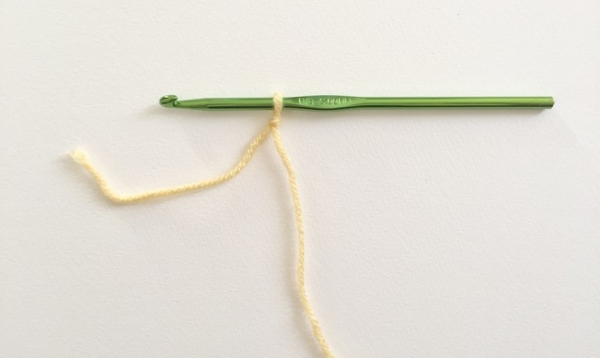
Now pull down the yarn to tie the knot and make sure that is fixed tightly. Moreover, here is How High Heels Are Made | History, Raw Materials, and Manufacturing!
Now since you have successfully tied the slip knot, let’s crochet the foundation chain
Crochet a Foundation Chain
We all know everything needs a foundation! Therefore, here is how you make a foundation for your crochet.
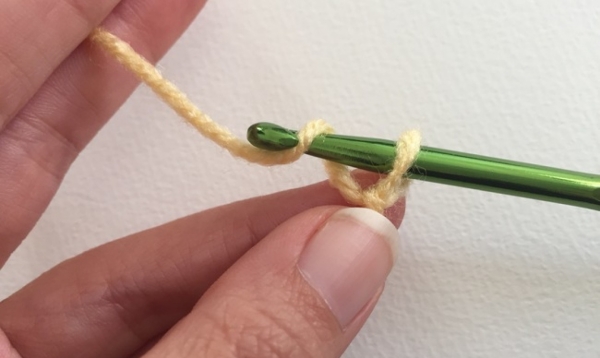
Hold the hook so that the end of the yarn hangs down, then hold it with your ring finger, and thumb. Hold the yarn thread with your index figure and middle finger and keep the yarn ball close. With this, here is How to Choose Best Shade of Lipstick for your Skin Tone!
Now put the working yarn over the slip knot that we created and move your needle’s hook to the right through the slip knot. You will have two loops, one above and one beneath which are called chain loops. In addition, here are How Wigs Are Made | History, Materials, and Manufacturing!
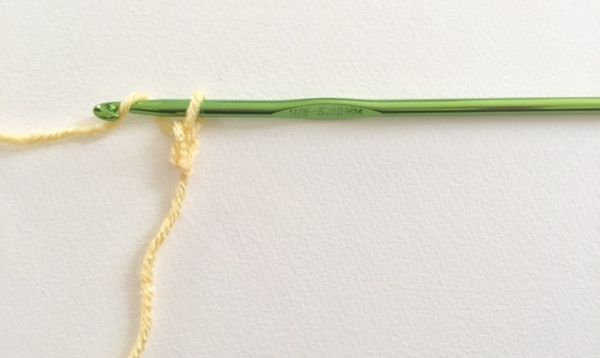
Keep repeating it and for about 20-25 times and you will have a foundation chain. In addition, here is The Easiest Way to Get a Tan Right Through Your Swimsuit!
We are proud of you that you could do the chain so fain. Now let’s get a step further to the single crochet chain
Single Crochet
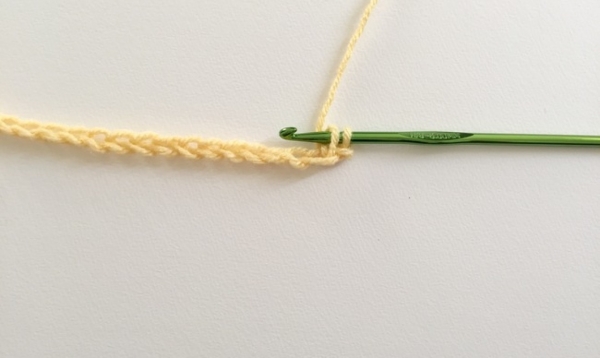
Now since the first row has worked as the foundation chain, every chain must look like a “v”. This is essential so that you can further create the crochet. Now insert the hook from the backside to the front. Here there should form 2 loops and 1 strand should be below the hook.
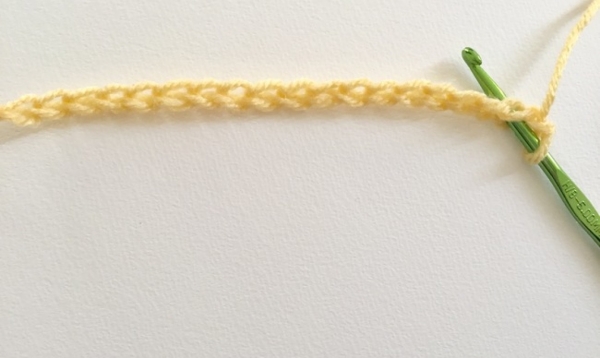
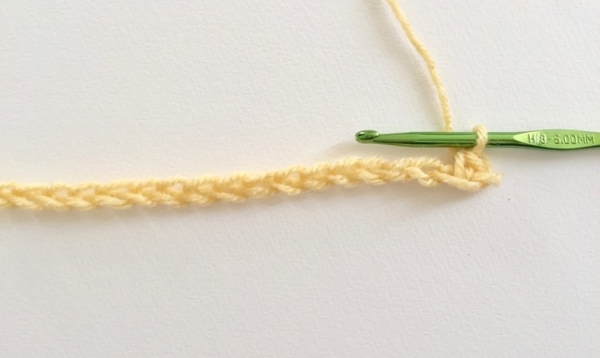
With the hook, take the working yarn and make it yarn over yarn. Take care that you don’t stretch the yarn or the chain.
Now again pull the yarn through the v and move the needle to the right while you bring the working yarn back through the chain. After this, there should be two loops
Now keep repeating the process until you reach until the end. Now repeat the whole process of single chain crochet.
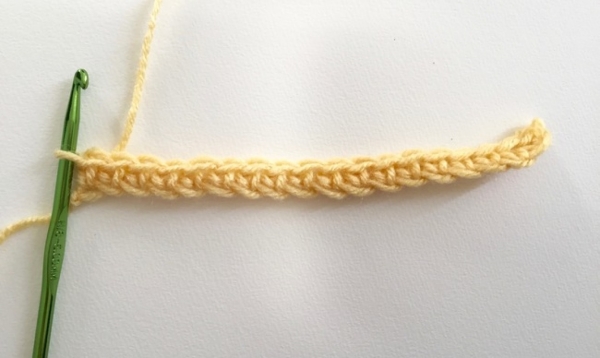
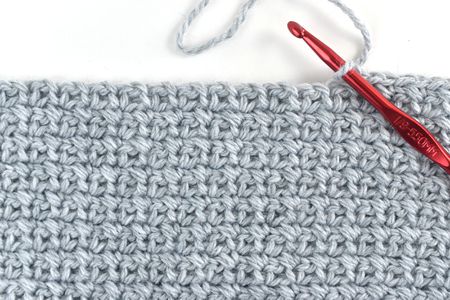
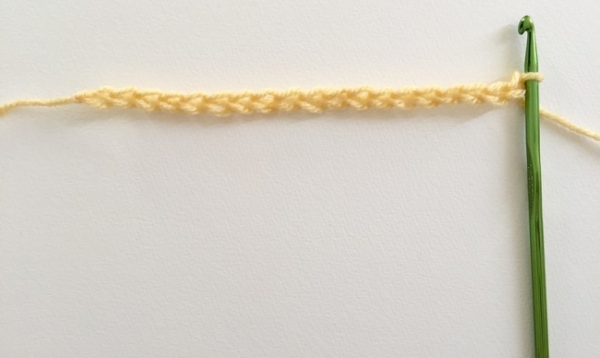
The finished product should look like this. Now since you have learned this, you can make a little bandana or a hairband out of it.
Here’s the summary and the important tips to keep in mind
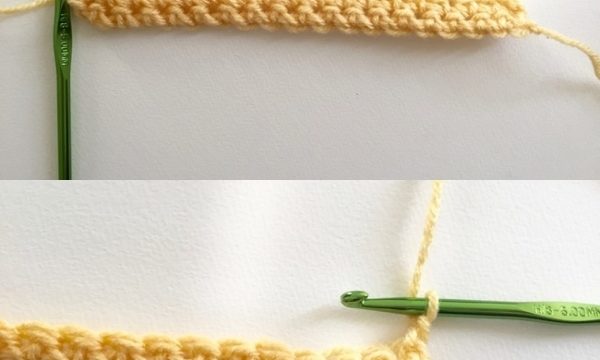
Know Where To Insert Your Hook
Make sure that your crochet should always go from the following or the next stitch that is next to the one you have recently worked upon. You should insert it in such a way that it is always going between the legs of the V that is on the top of the stitch. In addition, here are Different Types of Watches that You Must Know!
Count the number of stitches
While doing this stitch that is the simple stitch, your stitch count should be of the exact number in each row. There should not be 20 stitches in one row and 21 in another or 20 in one row and 19 in another. The count of the stitch should be equal in every row. For this, start counting as you start stitching. If by mistake when you reach the end of the row and you don’t have the exact same count, you will have to go back and start all over again for the same row. With this, here are Perfect Shoes for the Office or the Weekend That Every Women Must Have!
Since now that you have learned How to be a Pro at Crochet Stitching – Crochet Sticking Guide for Beginners, you can make some profit out of it.
Reply